Hi fairies,
Today I’ve
used red eyeshadow, which isn’t one of the most loved shades, probably because
it’s hard to find a good one and also because it’s not easy to wear it without
looking sick. I tried my best to show you a wearable yet dramatic look
featuring red, I like how it turned out and I hope you will too!
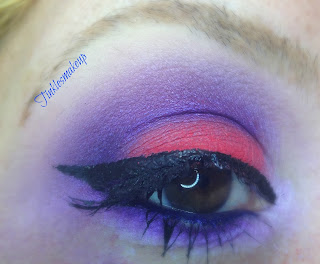
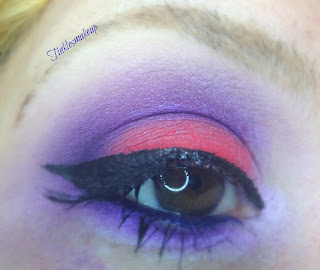
I started by applying a purple in my crease and outer corner with a blending brush and I built the color up little by little : when working with vibrant shades like this one it’s better to apply a little bit of color at time to avoid getting a dark patch impossible to blend! On my lid I placed a red eyeshadow, I patted it on for the best possible color pay off; I added a lavender eyeshadow around the edges of the purple to blend it out more and create a nice transition to the browbone. I completed the look with eyeliner and mascara, and that was it!
I started by applying a purple in my crease and outer corner with a blending brush and I built the color up little by little : when working with vibrant shades like this one it’s better to apply a little bit of color at time to avoid getting a dark patch impossible to blend! On my lid I placed a red eyeshadow, I patted it on for the best possible color pay off; I added a lavender eyeshadow around the edges of the purple to blend it out more and create a nice transition to the browbone. I completed the look with eyeliner and mascara, and that was it!
Italian version:
Ciao fatine,
Oggi ho usato un ombretto rosso, che non è uno dei colori
più amati, probabilmente perchè è difficile trovarne uno valido e anche perchè
non è facile da portare senza sembrare malate. Ho cercato di fare del mio
meglio per proporvi un look portabile ma al tempo stesso drammatico con
protagonista il rosso, mi piace come è venuto e spero piaccia anche a voi!
ho iniziato applicando un ombretto viola nella piega e nell’angolo esterno dell’occhio con un pennello da sfumatura, e ho intensificato il colore poco alla volta: quando si lavora con tonalità così intense è meglio applicare poco colore alla volta, in modo da evitare di creare macchie impossibili da sfumare! Sulla palpebra mobile ho applicato un ombretto rosso, che ho picchiettato affinchè risultasse il più vibrante possibile; ho aggiunto un ombretto color lavanda sui bordi dell’ombretto viola per sfumarlo meglio e creare una sfumatura omogenea verso l’arcata sopraccigliare. Ho completato il look con dell’eyeliner e del mascara, ed è tutto!
ho iniziato applicando un ombretto viola nella piega e nell’angolo esterno dell’occhio con un pennello da sfumatura, e ho intensificato il colore poco alla volta: quando si lavora con tonalità così intense è meglio applicare poco colore alla volta, in modo da evitare di creare macchie impossibili da sfumare! Sulla palpebra mobile ho applicato un ombretto rosso, che ho picchiettato affinchè risultasse il più vibrante possibile; ho aggiunto un ombretto color lavanda sui bordi dell’ombretto viola per sfumarlo meglio e creare una sfumatura omogenea verso l’arcata sopraccigliare. Ho completato il look con dell’eyeliner e del mascara, ed è tutto!
Products used:
nyx
cosmetics white eyeshadow base
sugarpill
sparkle baby palette in frostine
urban decay
pressed pigment in urban
kiko
cosmetics infinity eyeshadow nr 208
urban decay
eyeshadow naked 2
urban decay
eyeshadow foxy
urban decay
eyeshadow faint
kiko smoky
eye pencil nr 05
kiko
definition waterproof liquid liner


